Table of Contents
ToggleThere’s nothing quite like the rush of landing a perfectly-timed ultimate or clutching a 1v5 fight in Overwatch. But then what? That amazing moment disappears into the void of replay history unless you actually capture it. Whether you’re chasing highlight-reel clips for your portfolio, documenting insane team fights, or just building a personal gallery of your greatest Overwatch moments, knowing how to take compelling Overwatch screenshots is a skill worth mastering. This guide covers everything from platform-specific capture methods to editing tricks, sharing strategies, and Overwatch 2’s built-in photo tools, all designed to help players preserve and showcase their gaming prowess.
Key Takeaways
- Master Overwatch screenshots across platforms using native tools: Print Screen or Windows + Shift + S on PC, the Create/Share button on consoles, and platform-specific shortcuts for cloud gaming services.
- Timing, composition, and camera angles matter more than raw capture mechanics—frame your hero off-center using the rule of thirds, capture during ultimate activations, and use third-person replays for dynamic Overwatch screenshots.
- Editing software like Adobe Lightroom and Photoshop enhances screenshots subtly with 5-15% saturation boosts and contrast adjustments, while Overwatch 2’s built-in Photo Mode provides color grading, depth-of-field, and HUD toggle features without post-capture editing.
- Organize your screenshot library with a consistent folder structure (by season, hero, or event type) and descriptive naming conventions (YYYY-MM-DD format) paired with cloud backup through OneDrive, Google Drive, or Backblaze to prevent data loss.
- Share Overwatch screenshots strategically across platforms—Twitter/X for esports discourse, Reddit’s r/Overwatch for community engagement, Instagram for polished aesthetic content, and YouTube for highlight montages to maximize visibility and audience building.
- Competitive documentation through high-quality screenshots proves clutch plays, documents cosmetics, and builds a personal brand—consistency beats sporadic posts, so share 2-3 screenshots weekly to grow your gaming portfolio faster than posting occasional viral moments.
Why Screenshot Mastery Matters for Overwatch Players
Screenshotting isn’t just for casual memory-keeping. For competitive players, content creators, and esports enthusiasts, high-quality Overwatch screenshots serve multiple purposes. They document character skin combinations, prove clutch plays for your community, create engaging social media content, and build visual proof of your progression or skill ceiling.
In the competitive scene, screenshot documentation matters. When a controversial play happens, a suspicious headshot from Widowmaker, a frame-perfect Reinhardt charge, the community often demands visual evidence. High-quality, well-angled screenshots can cut through debate. Beyond competitive appeal, casuals benefit too: sharing your freshly-acquired legendary skin, commemorating a losing-but-hilarious match, or capturing environmental storytelling moments in maps like Busan all rely on solid screenshot fundamentals.
The technical side matters just as much as the creative one. Blurry screenshots, awkward angles, or cluttered HUDs don’t convey impact. Mastering timing, composition, and platform-specific tools separates forgettable images from the kind of screenshots that earn comments, shares, and respect in gaming circles. Whether you’re Mastering the Art of Team Victory or just vibing in Quick Play, the ability to freeze a moment perfectly elevates how others perceive your gameplay, and how you remember it.
How to Capture Screenshots in Overwatch Across All Platforms
Screenshot mechanics vary dramatically by platform. What works on PC differs entirely from console capture, and cloud gaming adds another layer of complexity. Understanding your system’s native tools is the first step toward consistent, high-quality captures.
PC (Windows and Mac)
Windows players have multiple options. The quickest method is pressing Print Screen or PrtScn, which copies a full-screen screenshot to the clipboard (paste it into an image editor or file manager). For a more streamlined approach, use Windows + Shift + S to activate the Snipping Tool, which lets you select a custom capture area before saving.
For Overwatch specifically, NVIDIA and AMD graphics drivers offer built-in overlay capture. NVIDIA GeForce Experience (press Alt + F1) captures screenshots and videos: AMD Adrenaline provides similar functionality via Ctrl + Shift + F11. These tools often save directly to a dedicated folder, making organization simpler than hunting through your Downloads.
Mac users should press Cmd + Shift + 3 for a full-screen capture or Cmd + Shift + 4 to select a specific area. The screenshot lands on your desktop by default. Mac’s built-in Screenshot app (accessible via Cmd + Shift + 5) offers additional controls: delayed captures, floating thumbnails for quick editing, and direct cloud sync options.
For content creators seeking frame-perfect moments, Overwatch for Mac: Unlock Thrilling Gameplay with These Easy Methods offers deeper performance insights that can influence your capture quality and refresh rate stability.
Console (PlayStation and Xbox)
PlayStation 5 owners press the Create Button on their controller to open the capture menu. From there, select “Take Screenshot” to capture the current frame instantly. Older PS4 hardware uses the same button (labeled “Share”). Screenshots save to your console’s storage and sync to your PSN profile, accessible via the PlayStation app on mobile or PC.
Xbox players press the Xbox Button to bring up the guide, then navigate to Capture & Share > Take a Screenshot. Alternatively, press Xbox + Y as a direct shortcut. These screenshots upload to your Xbox Live profile and cloud library, making them accessible from any device signed into your account.
Both consoles support capture directly from replay footage. In your recent matches, load the replay viewer, pause at the desired frame, and take a screenshot. This method is ideal for frame-perfect moments that might otherwise require multiple attempts during live gameplay.
Cloud gaming via Xbox Game Pass and PlayStation Plus adds a wrinkle: cloud-captured screenshots may have lower resolution than native console captures, so prioritize native captures whenever possible.
Mobile and Cloud Gaming
Mobile Overwatch gameplay is limited, but if playing through cloud gaming services, your mobile device’s native screenshot tools apply. Android uses Power Button + Volume Down, while iOS uses Power Button + Volume Up or swipe down from the top-right corner (newer models).
Cloud gaming (Xbox Cloud Gaming, GeForce Now) streams Overwatch from remote servers. Screenshots via native mobile tools capture the stream, not raw game files, so expect slightly lower quality compared to native captures. For serious content from cloud gaming, consider screen recording instead.
Best Practices for Taking Compelling Overwatch Screenshots
Raw capture mechanics matter far less than when and how you press that screenshot button. Timing, composition, and visual settings dramatically shift the impact of your images.
Timing and In-Game Moments
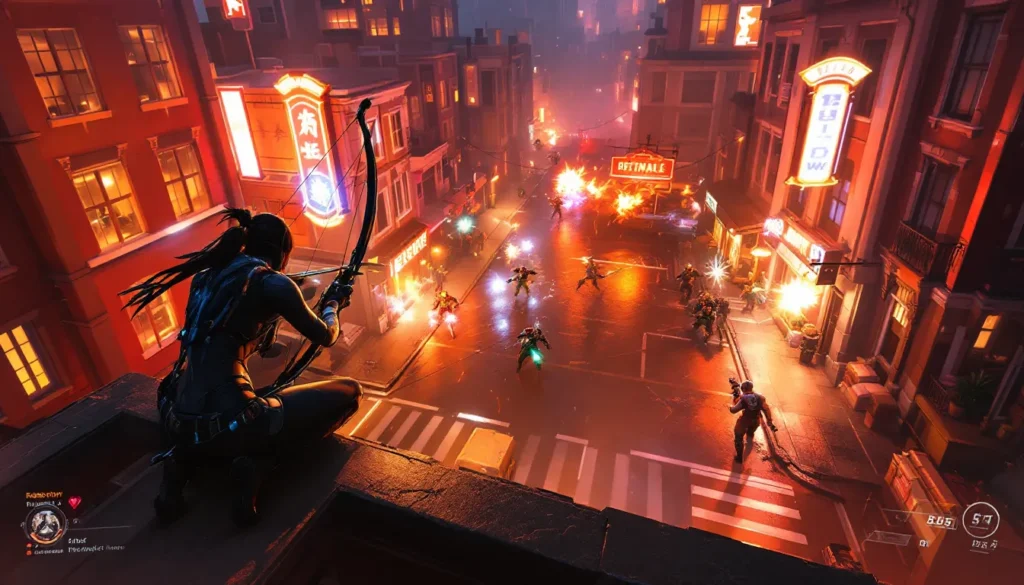
The best screenshots occur during high-stakes moments: ultimate ability activations, team fight peaks, or character-specific power moments. A Genji mid-dash, Tracer mid-blink, or Reaper wraith-form activation creates visual dynamism that static poses can’t match. Ultimates like Widowmaker’s Infra-Sight, D.Va’s Mech Call, or Zarya’s Graviton Surge are inherently visually striking.
Fighting near environmental hazards (cliffs, water, destructible terrain) or dynamic elements (Ilios’s well-edge, King’s Row’s storefronts) adds contextual depth. Screenshots during map-wide chaos, multiple ultimates, staggered teamfights, environmental destruction, convey intensity better than calm moments.
Timing extends to seasonal and cosmetic context. If you’ve just unlocked a legendary skin, screenshot immediately after equipping it. If you’re documenting Overwatch Christmas: Unwrap Exciting New Skins, Events, and Community Fun, capture holiday-themed cosmetics during festive events. Seasonal context elevates perceived value.
Camera Angles and Composition
First-person screenshots feel claustrophobic. Use third-person replays for broader compositions. Jump into a replay, adjust the free-roaming camera to frame your hero prominently while capturing teammates, enemies, or environmental context in the background.
Rule of thirds applies in Overwatch like traditional photography: position your main subject off-center, with supporting elements (objectives, enemy players, environmental landmarks) filling the frame strategically. A Reinhardt charging toward the objective looks more dynamic when positioned left-of-center with the enemy team visible right-of-center rather than centered symmetrically.
Elevated angles flatten compositions: extreme downward angles feel unstable. Aim for eye-level or slightly upward perspectives, which feel more authoritative. Close-ups on hero faces (especially with expressive skins) create emotional impact: wide shots reveal team positioning and tactical context.
Zoom strategically. Don’t max zoom (too claustrophobic) or zoom out entirely (hero becomes a speck). Most compelling screenshots use 40-70% of available zoom depth, balancing hero visibility with environmental context.
Lighting and Visual Settings
Overwatch’s lighting is map-dependent. Well-lit maps like Lijiang Tower or Ilios produce naturally crisp screenshots: darker maps like Rialto or Junkertown demand gamma adjustment or strategic positioning near light sources. Screenshot during daylight portions of day/night cycle maps.
HUD visibility affects composition. Hiding the HUD creates cleaner frames, in replay mode, you typically have toggle options. Conversely, keeping abilities visible (cooldown displays, ultimate percentage) documents your in-game status and skill expression.
Film grain and motion blur settings impact perceived crispness. For screenshots (unlike gameplay), disabling motion blur yields cleaner detail. Film grain preference is subjective, some players embrace the grittiness, others prefer pristine clarity.
Character model quality, reflection settings, and texture detail matter at high resolutions. PC players can max graphics settings specifically for screenshot moments: console players are locked to their performance tier. Lighting effects, shadow quality, and particle density all influence how polished your screenshot appears. If documenting competitive Overwatch progression, maximize visual fidelity to reflect your skill tier authentically.
Editing and Enhancing Your Screenshots
Raw screenshots are a starting point. Strategic editing amplifies impact without crossing into artificial or misleading territory.
Essential Editing Tools and Software
Adobe Lightroom (subscription-based) offers non-destructive editing: adjust exposure, contrast, saturation, and sharpness without losing original data. For Overwatch, subtle adjustments (5-10% increase in contrast, 10-15% saturation boost) enhance vibrancy without oversaturation.
Photoshop (subscription) provides precision: spot removal, content-aware fill for stray UI elements, layer-based adjustments, and advanced color grading. If you captured a screenshot with a teammate’s name tag cluttering the frame, content-aware fill removes it seamlessly.
Free alternatives are viable: GIMP (open-source, desktop) and Pixlr (web-based) handle cropping, color adjustment, and basic filters. Snapseed (mobile) applies selective edits, darken surroundings to spotlight your hero, brighten teammate positioning.
DxO PhotoLab specializes in raw photo processing and noise reduction, useful if your screenshot appears grainy or noisy. Capture One Express offers one-click profiles for different game aesthetics.
For competitive documentation, transparency is key: avoid heavy filters or misleading edits that distort how the moment actually played out. Esports-focused content demands authenticity.
Common Enhancements and Filters
Saturation and vibrance adjustments are industry-standard. Gaming has inherent color grading: slightly boosting saturation (15-25% range) makes skins pop without appearing cartoonish. Vibrance increases muted tones while preserving skin tones, ideal for hero-focused shots.
Contrast and clarity sharpens edges and visual punch. A 5-10% clarity increase makes particle effects (ultimates, ability impacts) visually crisper. Over-clarifying creates an artificial “HDR” look: restraint preserves authenticity.
Exposure and shadows reveal detail in dark areas. If a screenshot from Junkertown or Hollywood is slightly underexposed, lifting shadows 10-15% recovers detail without blowing out highlights.
Crop and straighten eliminates distracting edges. If your free-roaming camera angle is slightly tilted, a 1-2 degree straightening restores balance. Cropping to 16:9 (widescreen standard) or 4:3 (square social media) depends on your distribution platform.
Color temperature adjustments subtly warm or cool the image. Warm-toned screenshots (orange/red shift, +200-400K) feel energetic: cool-toned screenshots (blue shift, -200-400K) feel competitive or cinematic. Consistency across your screenshot library builds visual brand identity.
Vignette effects (darkened edges) naturally draw focus to the center frame, useful if your screenshot’s periphery is cluttered. Subtle vignettes (20-30% opacity) work: heavy vignettes look dated.
Faded blacks, lifting the black point so shadows aren’t pure black, create a slightly washed-out, retro aesthetic popular in gaming circles. It’s divisive but intentional and reversible.
Where to Share Your Overwatch Screenshots
Capturing and editing screenshots means nothing if nobody sees them. Strategic distribution amplifies reach and community engagement.
Social Media Platforms and Communities
Twitter/X dominates esports and gaming discourse. Screenshots paired with brief context (“insane Widow line-up” or “finally got the skin”) generate comments and retweets. Gaming accounts thrive on consistent visual content: Overwatch clips and screenshots every few days build audience.
Reddit’s r/Overwatch and platform-specific subreddits (/r/OverwatchUniversity for educational content, /r/OverwatchTMZ for drama) welcome high-quality screenshots. Competitive moments, funny bugs, and outfit combinations perform well. Avoid low-effort posts: context and quality matter.
Instagram (image-first platform) favors polished, well-composed screenshots. Consistent posting, relevant hashtags (#Overwatch #GamingScreenshots #OverwatchClips), and engagement with similar accounts build a following. Instagram Stories allow temporary, casual sharing without the permanence of feed posts.
TikTok accepts vertical video, but screenshots can anchor quick montages or meme content. Pairing screenshots with trending audio creates virality: gaming communities on TikTok are massive.
Discord servers dedicated to Overwatch (official, competitive teams, region-specific communities) have screenshot channels. Sharing directly with relevant communities (a screenshot of your new Legendary skin in a fashion-focused server, or a clutch competitive moment in a ranked community) generates immediate, contextual feedback.
YouTube works for screenshot montages set to music. Editing 50-100 high-quality screenshots into a 2-5 minute video with background music creates portfolio-worthy content. Many esports players and coaches build followings through highlight reels.
Blizzard’s official Overwatch forums and in-game community features allow direct sharing. Official channels sometimes feature fan content, offering potential visibility boost.
For competitive players, documentation matters differently. Sharing competitive highlights on esports news platforms (if you’re a pro player or content creator) provides credibility and recruitment visibility. Amateur players sharing ranked highlights build personal brands and attract potential team scouts.
Consistency beats sporadic viral posts. Posting 2-3 screenshots weekly builds an audience faster than posting one masterpiece monthly. Engagement (responding to comments, reposting community content) strengthens community ties.
Organizing and Storing Your Screenshot Library
After months of capturing Overwatch moments, you’ll have hundreds or thousands of screenshots scattered across devices and folders. Organization prevents chaos and ensures you can retrieve specific moments quickly.
Folder Structure and Naming Conventions
Create a root folder: Overwatch Screenshots. Subdivide by context:
- By Season (Season 1, Season 2, etc.)
- By Hero (Widowmaker, Reinhardt, Tracer)
- By Event Type (Competitive, Casual, Events, Cosmetics)
- By Map (if documenting map-specific moments)
- By Date (YYYY-MM-DD format for chronological sorting)
Naming conventions prevent file confusion. Use descriptive, sortable names:
2026-03-15_Widowmaker_Headshot_King's Row.pngSeason12_Competitive_6K_Zarya_Graviton.pngLegendary_Skin_Genji_Dragon_Dancer.pngBug_Documentation_Reinhardt_Charge_Stuck.png
Include date (YYYY-MM-DD), hero name, context, and location when relevant. Avoid vague names like “screenshot1.png” or “epic moment.png”, you’ll regret it when searching. Consistency (always date-first, always hero name) makes sorting intuitive.
Use a spreadsheet to track high-value screenshots: competitive milestones, rare cosmetics, or moments worth social media sharing. Columns: Date, Hero, Event, Description, Platform, Edited (Y/N), Shared Where. This metadata makes repurposing content across platforms effortless.
Cloud Storage and Backup Solutions
Local storage is convenient but fragile. A hard drive failure, corrupted file, or lost device erases irreplaceable moments. Cloud backup is non-negotiable.
OneDrive (Microsoft) or Google Drive offer free tiers (5-15 GB) and integrate with Windows/Android/iOS. Files sync automatically across devices. Overwatch screenshots (typically 2-5 MB each) consume storage rapidly, so paid tiers ($1-2/month for 100-200 GB) are practical.
iCloud (Apple users) syncs across iPhone, iPad, and Mac seamlessly. Dropbox provides 2 GB free (or 2 TB/month paid) with excellent cross-platform support.
Backblaze or Carbonite offer automatic, unlimited cloud backup. These services back up your entire computer continuously, protecting not just screenshots but your entire library. Annual subscriptions cost $70-150.
For competitive or esports documentation, consider redundancy: local backup on external drive + cloud storage + secondary cloud service. If your screenshot proves competitive integrity or breaks a storyline, you want multiple copies.
Version control matters. If you edit a screenshot, save the edited version separately rather than overwriting the original. Naming: 2026-03-15_Widowmaker_Headshot_King's Row_Original.png and 2026-03-15_Widowmaker_Headshot_King's Row_Edited.png preserves both raw and processed versions.
Permissions and sharing: if collaborating with teammates or creating team content, use shared folders (Google Drive, OneDrive Shared) rather than emailing files back-and-forth. Version control and centralized storage prevent confusion.
Advanced Screenshot Features in Overwatch 2
Overwatch 2 introduced native tools specifically designed for screenshot enthusiasts, reducing reliance on external editing software for many use cases.
Photo Mode and Creative Tools
Photo Mode (accessible via Settings > Options > Gameplay) pauses the game and unlocks a free-roaming camera with extensive customization. Unlike replay-based screenshots, Photo Mode allows mid-match pausing without interrupting teammates’ gameplay in custom games or practice range.
Within Photo Mode, adjust:
- Camera position and rotation (full 3D freedom)
- Field of view (35-110 degrees, useful for framing)
- Focus distance and depth-of-field (blur background to spotlight heroes)
- Exposure and highlights (in-game lighting adjustment)
- Color grading presets (Vibrant, Cool, Warm, Cinema, etc.)
- Film grain and chromatic aberration toggles
- Custom filters (stylization, contrast, saturation adjustments)
These in-engine tools eliminate post-capture editing for many players. A screenshot adjusted to “Cinema” preset with depth-of-field applied in Photo Mode often requires minimal external editing, a huge time-saver.
HUD visibility toggles within Photo Mode let you disable all UI elements (hero names, ability cooldowns, objectives) for clean, cinematic framing. Toggle selectively: maybe you want to see your hero’s name but hide enemy names.
Photo Mode’s depth-of-field (blur effect based on distance from camera) mimics photography techniques. Focusing on your hero while background blurs naturally draws viewer attention, no Photoshop required.
Custom presets save your favorite Photo Mode settings. If you prefer warm color grading with high contrast, save it as “Competitive Highlight” and apply it to future screenshots instantly. This creates visual consistency across your library without manual adjustment.
Limitations exist: Photo Mode only works in replays and practice range, not during live competitive matches. For mid-match moments, traditional screenshot methods (console/PC native tools) remain necessary. Overwatch 2’s Photo Mode shines for documented cosmetics, team photos, environmental storytelling, or post-match highlight frames.
Export options vary: PC players typically save screenshots to their drive directly: console players must transfer from console cloud storage to PC or mobile via the respective platform’s app for editing and sharing. Exploring Busan’s detailed environments via Photo Mode reveals architectural storytelling that standard gameplay doesn’t highlight, a great use case for the tool.
Frequent updates have expanded Photo Mode’s presets and filters. Check patch notes regularly: new color grading options or creative tools often ship with seasonal updates. Staying informed about upcoming season changes ensures you’re leveraging the latest Photo Mode features.
Conclusion
Mastering Overwatch screenshots transforms how you document, share, and relive your greatest gaming moments. From platform-specific capture methods to composition techniques, editing workflows, and distribution strategy, every element compounds into a polished personal portfolio.
Start simple: use your platform’s native tools, learn timing and angles through trial, and share consistently. As your skills grow, invest in editing software, explore Photo Mode’s creative tools, and build organized archives. The gamers who stand out aren’t just skilled in-game, they’re skilled at capturing and presenting their skill to the world.
Your next legendary highlight is worth more than a fleeting memory. Make it count.